Thursday, December 13, 2012

Roasted Butternut Squash and Toasted Hazelnut Soup

I bought a butternut squash to make some mac and cheeze...I had a little over half of one left, so I decided to make some soup with it. It is fairly simple, and I typically have all of the ingredients on hand...except the squash, so it is a great way to use up what you've got...because this recipe will freeze and reheat well.

I'm feeling overly tired today because I stayed up late making a ton of random foods for myself and friends...I hope everyone who reads this knows that if they showed up on my doorstep hungry, or not hungry I would feed you. I love cooking for people. I also really enjoy sharing foods that I think are tasty...so if you ever want some food, call me and invite yourself over...

Ok, sooooo here goes on the soup-ness:

Roasting le squash (<--French for "the squash")
Pre-Roasted...

1/2 a butternut squash
Spray oil or cooking spray...
Salt and Pepper

Scoop out the guts, peal the outside...make sure you get all the way down to the orange...the once over with the peeler is not enough.

Cube it...I'd say 3/4 inch pieces...Spray a foil covered pan, add the cubed squash, spray the squash and sprinkle with salt and pepper...If you want your soup to be more spiced, sparingly add some pumpkin pie spice or a bit of cinnamon.

Roast at 350 for 15-20 minutes tossing halfway through....done when easily pierced with a fork.

The roasting can be done in advance. Store the pre-roasted in a container in the fridge; you know the drill.

Making le soup (<-- French for "the soup")

1/2 cubed and roasted butternut squash...if you forgot this you may have memory problems...
1/4 cup diced onion
1/4 cup diced celery
1/2 cup diced carrot
4 cups of broth or water with boullion...or just water if you are out of both
Cinnamon stick
Salt and Pepper
1/2 cup hazelnuts (aka filberts!)

In a soup pot heat a couple TBL of oil over medium...add the carrots, celery, onion and cinnamon. Sautee until translucent. Probably 10 minutes. Use your eyes and your brain clock.

Sprinkle with Salt and Pepper as desired.

Add the broth. Bring to a boil and simmer for 5 minutes.


Toast the hazelnuts in the oven on 300 for 5ish minutes...I just wait until I can smell them. Let them cool a bit, then run them through a food chopper. If you don't have a food chopper try to crush or chop them with a knife and just use as a garnish.


Add the squash and actually squash it with a potato masher while it simmers. Simmer for 10-15 minutes.


If you are awesome and have an imersion blender...use it....if you suck like me put the soup in your blender, add the crushed nuts (hehe) and blend until smooth. The filberts won't become completely smooth...I like the texture, if you want soup-er smooth soup just add the nuts as a garnish.


Put your soup back in the pot and bring to a simmer for 10-ish minutes (or however long you are willing to wait) stir it as needed.

Put it in a bowl, sprinkle with crushed filberts and a dash of cinnamon. Then eat it.


It is pretty filling, but if you are searching for a higher protein content add some unflavored powder. Serve with cinnamon raisin toast or regular toast with margarine whipped with cinnamon...and drizzled with agave or sprinkled with sugar.

I just made this yesterday for the first time...so it probably isn't perfect...I'll let you know if I make updates, or let me know what changes you make to make it better...If you think it is perfect as is, you can let me know that too ;)

Saturday, December 8, 2012

Sausage Stuffed Mushrooms

This is a great everyday recipe, BUT it is also a great way to jazz up your “stuffing” side during the holidays. They are best warm, but if they get cold they are ok too. Annnnnnyway. These are the amounts for the numbers of mushrooms I made…I typically try to do 2 per person for medium sized mushrooms.

16 Med Sized Mushrooms (I like whites, about 2-3 inches in diameter)

MUSHROOMS.
 
Olive Oil

Apple cider vinegar

1pkg Tofurky Spicy Italian Sausages

Agave

2 huge handfuls of spinach rough chop

Half a bunch ‘o’ green onions (WHITE PARTS TOO)
1/3 cup chopped onion

2 stalks celery, finely diced

2 Cloves of garlic, minced

2/3 cup bread crumbs (seasoned is fine, panko is good, or homemade regular style)

1/3 cup nutritional yeast

½ cup non-dairy milk (Preferably plain almond, rice or soy…coconut might be weird, but hey, try it)

Some parsley…if you have it

Salt and pepper


Protection.
Wash the mushrooms. Cut off the nasty ass stems. THEN kind of twist them out…they should mostly come out clean and leave lots of room for the tasty goodness you are about to penetrate them with. If they don’t, just kind of clear some space…no need to maintain the stemness…you’re about to chop them up—so reserve them.


Whisk a few tablespoons of olive oil, half as much vinegar and some salt and pepper in a LARGE bowl…toss the mushrooms around in it. Let them hang out; you have plenty more to do.

Heat your pan. Put your sausage in the pan. (No, not your penis.) 4 Tofurky sausages…use a spatula or something to mash them to a pulp. Add the garlic. Heat through.

While that happens, chop the stems, pretty fine. You should have time now to chop the other stuff I said you need. When the snausage is heated through add the chopped stems and cook for 3-4 more minutes. Couple turns of the pan of agave. (Omit this if you only had flavored or sweetened milk to add later, otherwise it will be too sweet.)

Add the celery, onion, and green onions…mix ‘em in and cook for a few minutes.
Chopped stuff.

Add the bread crumbs, combine well

Add your non-dairy milk. Let it be absorbed into the mixture. It should be wet enough to stick together somewhat, but still be  a little crumbly...I have no idea what to compare it to…just think about how you need to stuff the mushrooms and if it seems like it won’t stick together well, then it probably requires more milk…

Heat your oven to 350.

Put the spinach in the pan, put the lid on and allow it to wilt. I usually do a rough chop on the spinach first. Stir it in…should look prettttty now.

Remove from heat. Add the nutritional yeast and salt and pepper...add the parsley here too now...if you want...


Stir it up.

Get out a baking sheet. Set it on the counter. No, not there…next to the big bowl of mushrooms and that tasty pan of deliciousness you just created.

Fill each mushroom until you think you can’t anymore, then add some more. I like to press it down into the mushrooms. "Packed."

You will probably end up with extra filling, if this happens…eat it and don’t tell anyone, or you can put it in a small baking dish and serve it if some hobos show up, OR you can just set it aside and eat in it in the next couple days as a side or snack.
Heaping...TASTY...But they still havent been baked...

Put the pan in the oven for about 30 minutes or until the mushrooms are to your tenderness liking. They should look tasty and brown, and wholly irresistible…Pretty simple.


Put them on a plate and serve them to people. J

This is one of the first recipes I ever made up...so I really hope you enjoy it.

Friday, December 7, 2012

Holly-Daze

 
I’m not feeling it. I have spent my entire life loving and enjoying the Fall through the New Year, celebrating with family, friends and co-workers. I’ve been the one who decorated my folks’ house (inside and out), helped cook food, organize parties…etcetera, etcetera…This year though…I just don’t feel like it. I long for summer, a ridiculous number of activities, and good outdoor fun. Oh well. It ain’t summer…


Some people just cope...Hahaha
There are so many different Holidays this time of year. No matter your religious, cultural, or family background there is a good chance you spend much of December celebrating something, even if you are the epitome of a lone wolf…you probably have some work related party or at least some tradition of being the most rad, cool, lonesome human being during a season of gathering.

I love to bake and give away sweets...
Traditions. That is what this time centers around. Perhaps everything you do, you do because that is what you have always done. Mindlessly buying expensive gifts for friends and family, making treats, going to a church you haven’t been to for 364 days. Whatever it is, whatever your reasons…I urge you to stop and think about why you do what you do.

I had a discussion with some folks and have read many posts about people abandoning Thanksgiving and rebelling against Christmas because of what the 2 represent. Typically we are smashed in the face with images of greed and gluttony. From where I stand, I have determined that holidays are only what you make them. If you disagree with the mainstream idea of what these days represent, then it is your responsibility to turn them into what that day/time/season means to you. Same goes for your everyday life.

Reject the negative and let this be an opportunity to make positive contributions to your community. I spent the last however many years helping my mom prepare and create the Christmas she wanted because it made her and the people around me happy. I gave them what they wanted, what they expected, because seeing a group of people I love the most in this world enjoying the work I had done is what I wanted.

Someone I love...Very much.
I still want to see them happy, but similarly, I want them to want the same for me. Exercising not only holiday traditions, but the manner by which I treat people year round has exhausted me. I give my love and time the way Americans spend money, with reckless abandon. I only have so much to give, I don’t have love and time like a credit card, my tank is empty and I fear the engine is about to cut out. I need love, and I don’t know where to find it.

Maybe the perception is that I have changed. I prefer to view it as evolving. For this reason, and those listed above, I will spend this season giving only what I am able. Traditions have to start somewhere.

I love giving gifts. It doesn’t matter the time of year, or if it is someone’s birthday, if I see something I think a person would enjoy, I like to get it for them. I don’t always just happen upon items, by listening to what people say about what they want, and what things are important to them, I often scour the internet researching how to get my hands on some priceless or seemingly irreplaceable items. I have a very hard time giving gifts that mean nothing…such a hard time that I don’t do it.

My mother had six children. Her holiday seasons have always been hectic. I have always helped prepare, execute and clean up the “doin’s.” This year I volunteered to host the dinner Christmas Eve. I have heard many complaints about what I would prepare from those who never contribute. I decided that they do not have a say. It was only at this point that they offered to prepare “food” of their choosing; they do not understand that would defeat the purpose. I want to have a Compassionate Christmas.
The Fire Place...5 siblings, 2 significant others, 5 nieces/nephews, and parents...

I have yet to decide about decorations…I have a fair amount. I will admit I love lights. LOVE LIGHTS…despite my disinterest in this season as a whole, I, like most living breathing things, am attracted to bright, shiny, flashing, colorful displays. So we’ll see how far I get with that, and trees and what have you…trees do smelllllll soooooo gooooooood. 
I’m not trying to be a party pooper…What I have wanted in the past is not what I want right now. I am making an attempt to do what I think is right, for me and for my community. This difference feels weird, and I am experiencing some guilt as a result, I don’t know how to remedy it. Some people want to “Keep Christ in Christmas,” others just want 60” TVs; I want Compassion and support, maybe I should write Santa…


Thursday, December 6, 2012

Random Sexist Thought

I am have never been like..."Pishawwww, Men are so stupid...They're all like...Yay sports! And MAN STUFF!!!" I do that more to women, because I think women tend to use their gender as an excuse...Whatever, here is my RANDOM SEXIST THOUGHT:

For me, thinking is the same as a stereotypical man going to fix a tiny issue. A problem as simple as tightening a screw turns into a 3 day project complete with the minimum 4 trips to the hardware store.

Never stops. FUUUUUUCK.

Wednesday, December 5, 2012

Single Serving Raw-ish Pumpkin Cheesecakes with Cocoa Crust


You may remember such things as me making Raw Berry Cheesecakes during summer…Well folks, it ain’t summer no more! (With a TWANG and plenty of “Bad-itude”) I had to come up with something equally delicious and exciting to impress some long time Vegans at my first Vegan Thanksgiving. Plus I like doing things that are awesome…and I happen to think these are.

If you need more picture to determine what the steps should look like, follow the link to the Berry version...There is more detail...

Please note I *STILL* do not own a food processor. If you have one this will work much better and faster for you…I have a small food chopper and a Ninja brand blender…So yeah, my process is extra “special.”

Other equipment you will need is a standard size muffin tin. Muffin papers are optional. It would probably work really well. I try to be fancy so I just grease the tins.
FIRST and FOREMOST : SOAK THE CASHEWS!!! At least 3 hours. I was able to do it for 8-ish hours this go-round, and the texture came out a bit better…more creamy, less…crumbly?

When your Cashews are 10-15 minutes away from total soaked-ness Prep the Crust

Crust
1.5 cup pecans
1.5 cup almonds
1/4 teaspoon salt
1-2 TBL of Cocoa Powder…taste test to see if it is at a desired chocolate-ness…
9+ medjool dates, pitted and chopped

Pulse nuts, cocoa, and salt in the blender. I like to do medium chop…not fine, not coarse…Rustic…? Add the chopped dates, sometimes you may need more dates...(Not referring to your love life.) Pulse until the mixture sticks together when pressed.

Grease your muffin tins with coconut oil. Or put the papers in. Evenly spoon the mixture into the tins. I found it was 1-2 heaping tablespoons each.

Press the mixture down. Up the sides a bit if you can…It makes them look more rad later. You want the shape to be concave.

Filling
2 cups raw cashew pieces, soaked at least 3 hours (I read no more than 7)
1/3 cup agave syrup
2 TBL of lemon or lime juice
1.5 teaspoon vanilla extract
1 can pureed pumpkin…NOT PUMPKIN PIE FILLING. (This is what makes these raw-ish…canned pumpkin is cooked…I think…)
3/4 cup coconut oil, melted
1 Tsp Pumpkin Pie Spice (Probably more)

Pulse cashews in food chopper until crumbly

Add some agave (I just did one turn of my small processor), lime juice and .5 tsp vanilla. If you find you need more liquid to get the mixture moving…add a little water. (Teaspoons at a time.)

PUREE. Scrape down the sides to make sure everything is fully incorporated.

When it was as smooth as I could get it (had the patience for) I added half the pumpkin to my blender, added the pumpkin pie spice, glopped in the cashew mixture, and put the other half of the pumpkin on top. I feel like layering makes things mix faster and better.

Blend until it is as smooth as possible. Taste test and determine whether or not you need a more pumpkin pie spicy flavor...I don't really remember how much I added...because it was a few weeks ago and I just added it until I thought it tasted right...

Add the melted coconut oil and blend until you think it is well incorporated.

Pour the filling into the muffin cups. They should come within millimeters of the top edge of the cup. Just make sure they are even. It may seem as though they will never set up but they do…

I had some extra crust, so I sprinkled that on top. These would benefit from a delicious vegan whipped topping…but I had neither the time nor the idea (at the time) to create such a thing. They look jazzier with some jazz on top…

Cover with plastic and let set in the freezer for at least 4 hours. Make sure they are flat…Otherwise they will look stupid. Set them out an hour before you intend to ingest. Some recipes say you can put them in the fridge…and that they will set up…I have not been able to commit to that yet…Someday…
Make sure to take a super fucking blurry picture...

This is a delicious treat. It is pretty light and enjoyable. Good substitute for the classic pumpkin pie…ENJOY!

On the table...Setting out...that's why they are frosty...
 
The table...Many people ask me what I ate on Thanksgiving...I just showed them this amazing picture.
 
The plate...I can't help but share...The picture...the food was all for me...
 
And DESSERT. Thumbprint cookies (Raspberry and Apricot), My Apple Pie (Recipe Here: http://lifehowirunit.blogspot.com/2012/11/apple-pie.html), Super Sweet Cinnamon Bunz
 In addition to enjoying making food and eating it...Thanksgiving this year was awesome for me. I got a chance to spend some time with my family...but also meet some amazing new folks (and eat their food) and hang with some good friends (and eat their food.) I hope in the future the people I met join the ranks of "good friends."
I hope you enjoyed your holiday as much as I did, and I hope this season, as well as the new year, brings you everything you have been working hard for.

Top of FormCHEERS!


Bottom


Tuesday, November 27, 2012

Granny's Split Pea Soup


My grandmother is 93 years old. She is an amazing human. In the past year and a half she suffered and survived a stroke and a hip fracture. She can’t do much on her own, but she is still so fucking smart and sassy. Anyway, it has been years since she whipped up any food…but it is still her recipe.

My grandpa (her husband) died December 20, 1992. (Just now realizing it was 20 years ago…) Every year, the week before Christmas, my family gets together to honor his memory while eating pea soup and an unreasonable number of rolls. (Basically instead of using spoons we sop up the soup with bread…its fucking weird…) I usually make dessert too…apple strudel…test recipe coming soon.

This recipe is kind of time consuming, but low maintenance, and will make your entire house smell like delicious pea soup. It is amazing for leftovers…freezes well. Enjoy!


2.5 Cups of Green Split Peas
One package Smart Bacon or an equivalent amount of some smoky protein
1.5 Cups chopped onion

¼ Tsp Marjoram
1 Cup Diced Celery

1 Cup Diced Carrots


Cover peas with 2 quarts cold water and simmer gently for 5 minutes

Remove from heat and let stand one hour

Meanwhile, cook up the smart bacon, cool and crumble. I like to do it in the oven…

Add onions, 1 tsp salt, ½ tsp pepper, and marjoram to the soup.

Bring to a boil, cover and let simmer 1.5 hours

Stir occasionally

Add Celery and Carrots, slowly simmer uncovered 20 minutes

Add Smart Bacon, cook 10 more minutes.

Serves 6-8.
 
 
Mmmm...Soup...
 

Saturday, November 24, 2012

Apple Pie

Apple is the only kind of pie I have ever made...Here's how.

Crust:

1.5 Cups Flour
3/4 Cups Earth Balance
Pinch 'o' Salt
Ice water

Make sure everything is cold. Cut the flour, butter and salt with a pastry knife.

Cutting with a Pasty Knife...
Ready to be formed into a ball/disk


When well combined and somewhat crumbly add just enough water to make a ball.

Form a disk, place on a well floured surface and roll it out so it fits in your pie plate.


Flip the dough over your rolling pin and place in your pie plate. This is the easiest way to get it in there without tearing. If your dough sticks to the counter use a super thin spatula to free it...don't freak out, just take your time and all will be fine. If holes are formed use the extra dough to patch it once you have it all settled in the plate.

Create an edge. I like to pinch a rim, my granny always pressed it with a fork. Put it in the fridge while you work on the filling.


Patches in the top left, little love in the center.
Filling:

An Assload of Apples (I usually pick up 8-10 Mixed)
Sugar
Lemon Juice
Cinnamon
Nutmeg
1/4 Cups Earth Balance

Wash your apples...or don't. Who am I to pretend I do a good job of washing produce? If you have a rad peeler, use it. If not have fun using a knife or hand peeler...Sucks, but PIE is worth it.


Sweet Peeler...
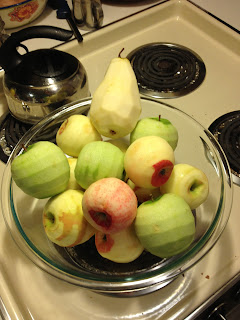
Looks like I added a Pear too...


Use the side of a box grater or a super rad thin slicer to slice the apples into a large bowl. If you have no box grater and no slicer, you MUST take the time to thinly slice the apples. If not you suck and should be embarassed. Chunky apples in pie is LAME.

Thinly sliced.

Remove your pie crust from the Fridge. Preheat the oven to 350.

Add 1/4 cup of sugar, sprinkle generously with cinnamon, few shakes of nutmeg, TBL or so of lemon juice to the bowl of apples and combine.


Put a thin layer of apples in the bottom of the crust, dust well with sugar, sprinkle with cinnamon and nutmeg, and place a few dots of earth balance.

Repeat with a layer that barely reaches the top of the crust.

Create another layer that mounds up above the edge of the pan, and top with the remaining apples.


If you have not stacked the apples in such a way that it seems insanely ridiculous you have not added enough apples.


Topping:

3/4 Cup Quick Oats
Handful Brown Sugar
1/4 Cup Flour
Cinnamon
Nutmeg
1/4 Cup Earth Balance (Maybe more...)
Ground pecans or walnuts are a good addition...


Cut the ingredients with the pastry knife. Should be crumbly, but easy to squish together...Can't have the topping rolling off the giant mound of tasty apple-ness you just stacked. Press the topping on the pie.


Cover a cookie sheet with foil, place the pie on the sheet and put it in the oven.


Bake at 350 for about an hour. Check every 10-15 minutes. If the edge crust or topping are getting too brown place a piece of foil on top for the remainder of the baking time. If the crust is too brown and the toppping is ok, put a band of foil around the edge. (You'll need to use hot pads, don't burn yourself, idiot.)


Let it cool for a bit, and then eat it...or let it cool all the way...I always heat up my pie...I am civilized afterall. Share.


Dessert. Slice 'o' Pie, Cinnamon Bun, Pumpkin Cashew Cheesecake, and Thumbprint Cookies